Average Reviews:

(More customer reviews)I found this interesting to learn another method to help Chinese brush painters finish their master pieces. Certainly well worth knowing and having another source to dry mount. This method clean, easy and no mess. An iron is the main item needed to complete this process. So Blue Heron has a good product to sell. I have done demostrations for other artist and have received positive feedback.
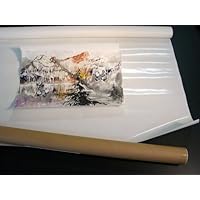
Click Here to see more reviews about: Silicone Paper for Dry Mounting Chinese Painting or Sumi-e(27" X 10 Yard)
The price is based on 27" x 10 yard (360"), or 66.5cm x 915cm unit size. You may order 20, 30, 40, or 50 yards. (The whole roll is 54 yards long. See our other item.)The release paper keeps adhesive film clean and makes adhesive film easy to handle and protect the artwork and the iron or press machine.Basic Mounting Method 1: Direct Mounting In this method the orginal painting is mounted directly to the silicone paper.1. Dampen the painting first. You may spray the original painting evenly with water. 2. Cut the silicone paper to the size exactly same as the original painting or slightly smaller. 3. Put 4 layers of denim cloth on the table as mounting surface.4. Set the iron temperature to 180° F (between Silk and Wool) and Start the ironing movement from center out, first in cross and then in X movements to avoid bubbles. 5. Apply less pressure in the beginning and gradually increase pressure later. Don't press too hard or set temperature too hot. In other words you want to avoid any big fold or wrinkles which would become permanent. Small wrinkles can be streched out easily with hot iron.Basic Method 2: Indirect Mounting.This method is transfer the silicon adhesive film to the backing material first, then take the release paper off and mount the painting on. Here are the steps:1. Place the silicone release paper filme side facing down, or mounting board, foam board etc.. 2. Iron it along the edge and let it cool a little bit. 3. Cut the Silicone Release Paper a little bit larger (1/4" - 1/2") than the board along the edge. (No need to measure!) 4. Peel the release paper off and save it for use in step 6.5. Trim the adhesive film along the board edge with a glue gone, knife or scissors.6. Lay the artwork face up on the adhesive film and cover it with the release paper from step 4.7. Now it's ready to put into a heat press machine or an iron. The more you use the more advantages will be found.
 Get 25% OFF
0 comments:
Post a Comment